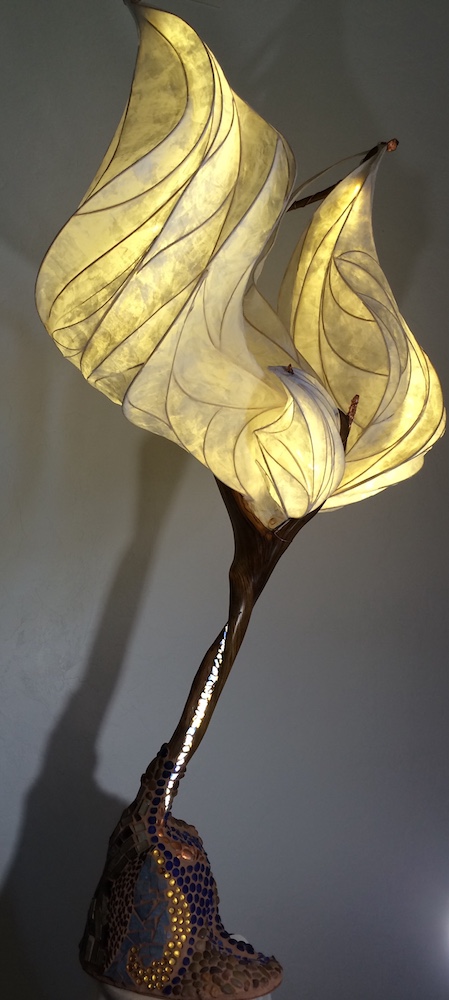
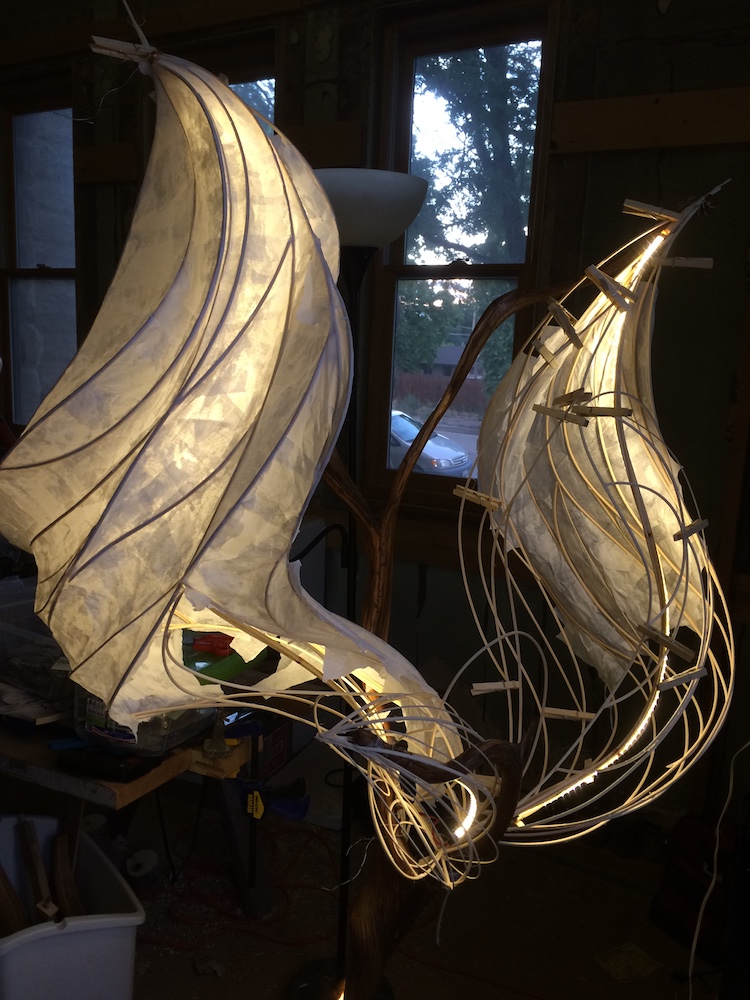
Illuminated Sculptures
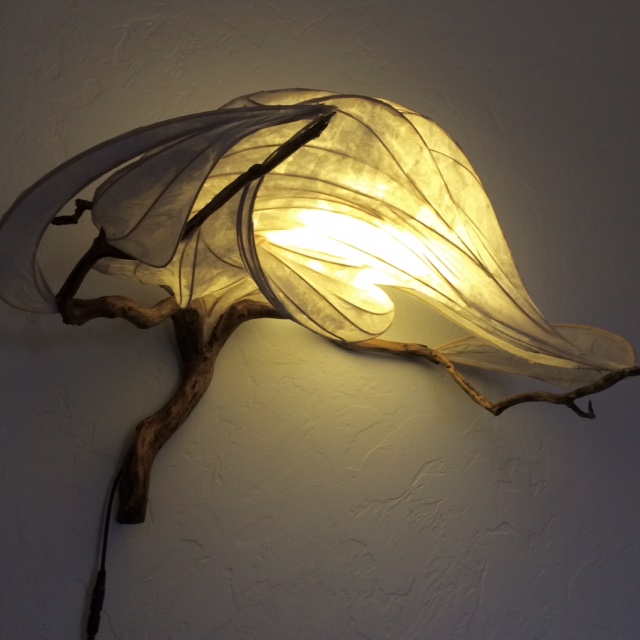
These translucent sculptures are created from paper, wood, glue, and reed with embellishments of fiber, metal, stone and glass and lit from within using cool LED technology. Each one is absolutely one-of-a-kind and impossible to recreate. Reed has a life of its own when used in this way, and will often dictate to me the shape it wants to take on.
These sculptures require knowledge as a woodworker, electrician, concrete worker, fiber artist, tile cutter, mosaic artist, and more…
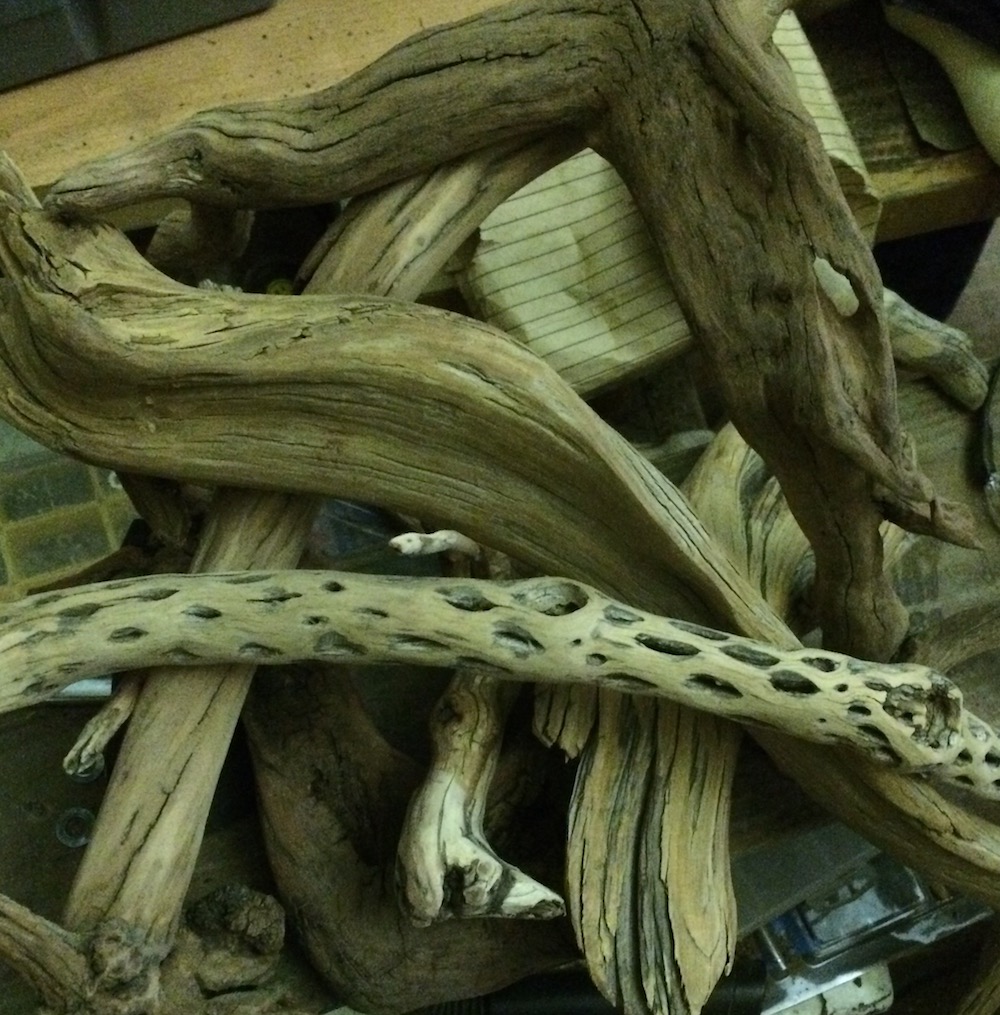
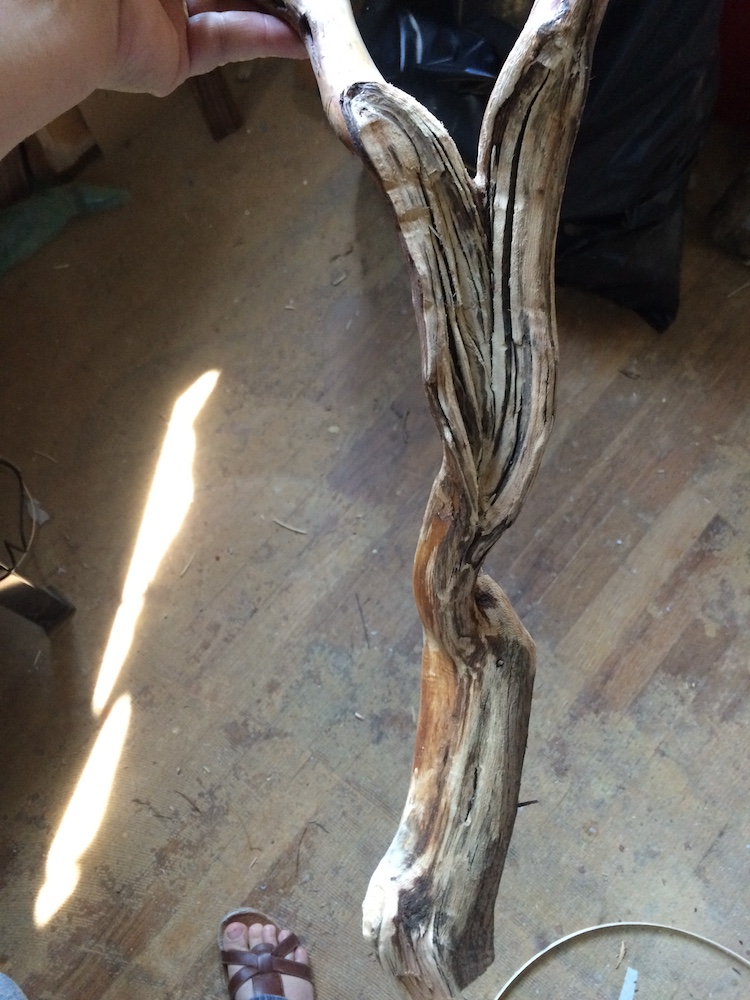
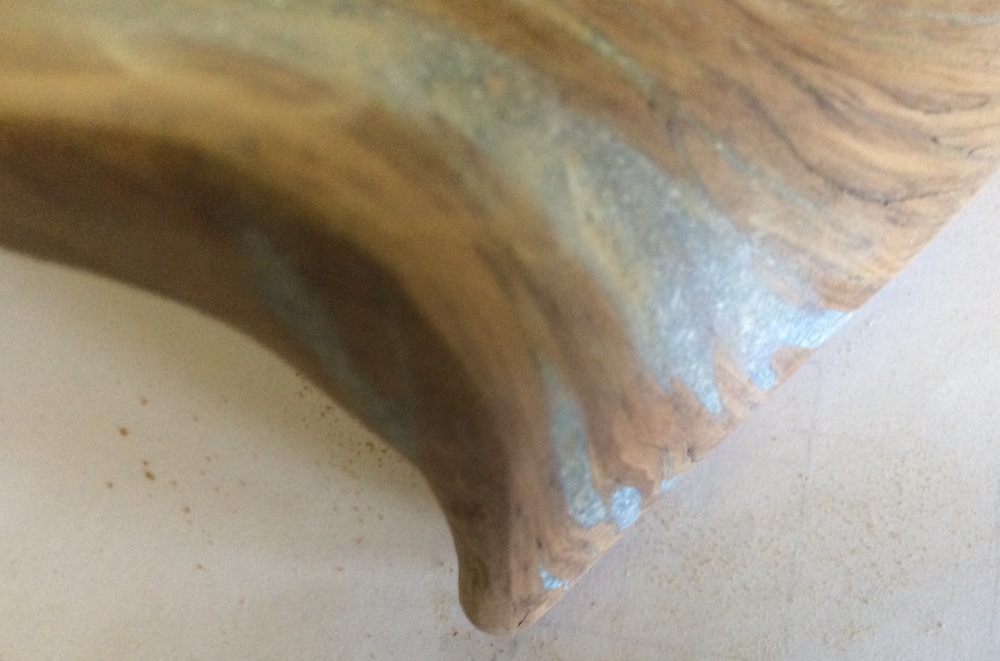
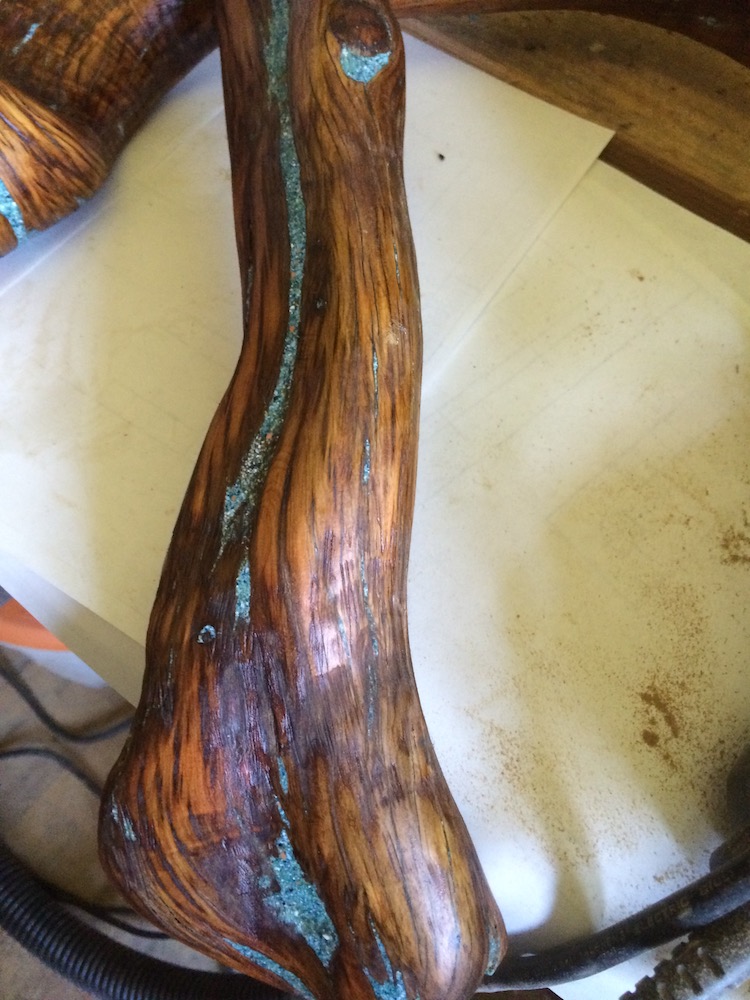
The wood as the inspiration for the piece…
The first step is choosing the wood for the base. I look for unique shapes, and decide very early on in the process whether this will be a free-standing sculpture or a wall-mounted one.
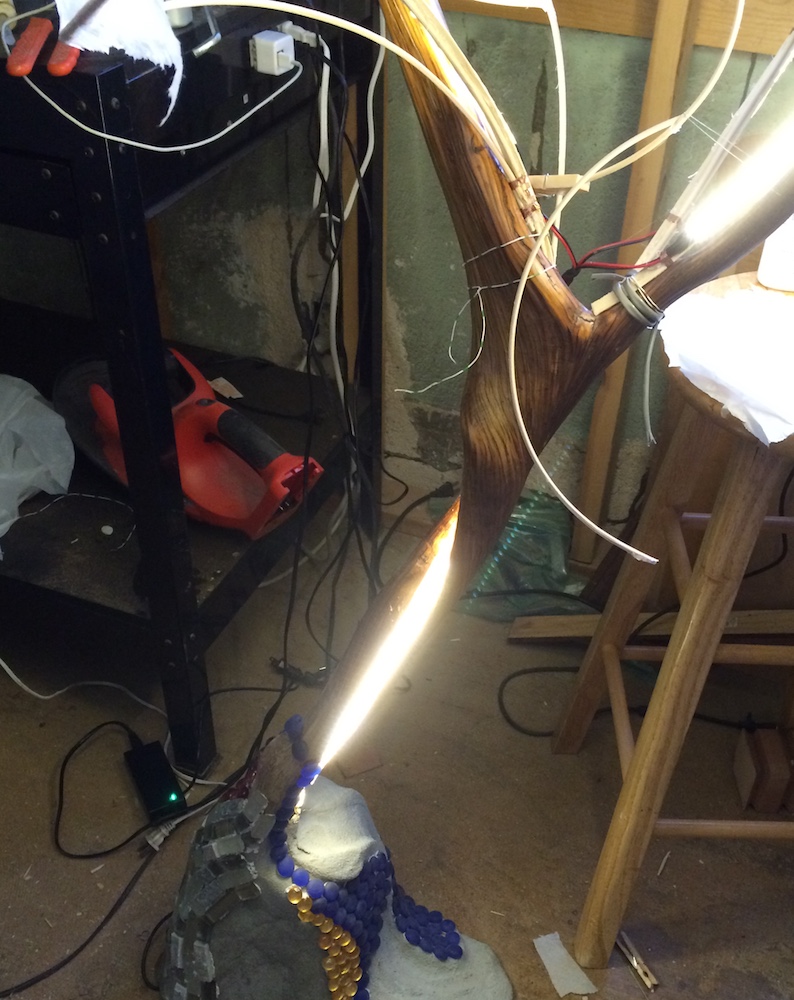
The lights inside…
I won’t spend a lot of time describing the wiring process, because it’s different for each sculpture and, frankly, I’ve never really taken pictures of this. I create a channel inside or on the back of the sculpture to hold the wiring. I add some sort of frame to the inside to hold the lighting in place. Generally, I use LED light strips because:
- I like having lots of small lights to be diffused by the paper.
- I like that they are flexible enough for me to fasten onto an inner frame that may twist or bend with the shape of the sculpture.
- When I bend them, I can control which direction the light is projecting, as well.
- I really, really like that they are very cool to the touch and don’t build up heat.
Adding a lightbulb inside a paper structure seems like a dangerous proposition to me, and honestly it’s the main reason I made the first one of these 20 years ago and didn’t do another until I discovered LED strips.
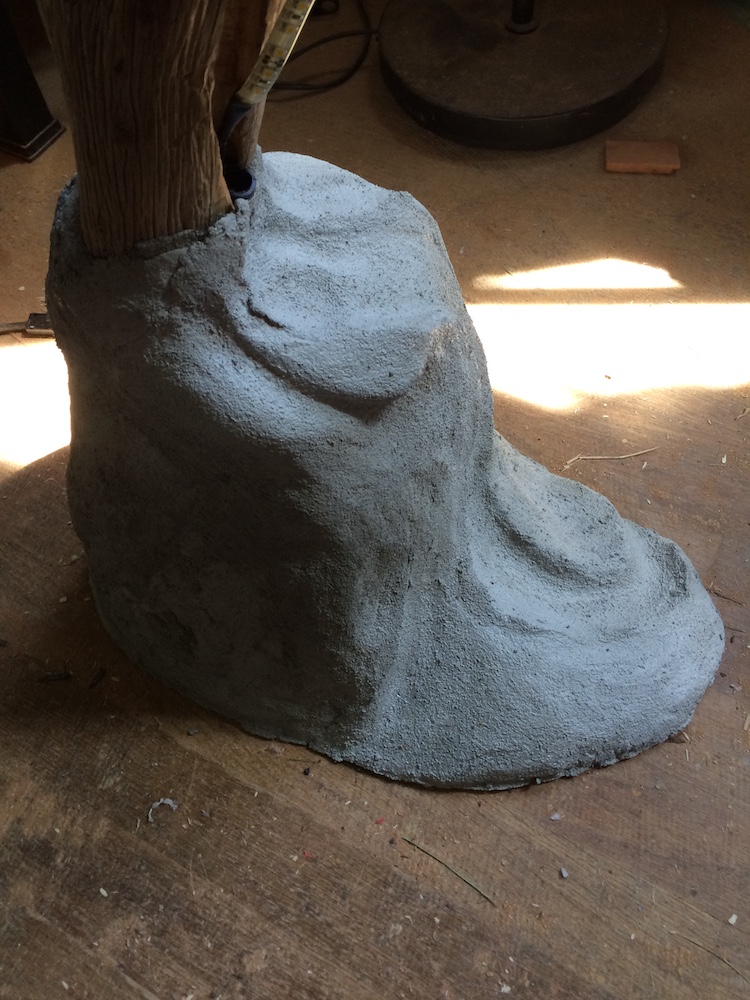
The base, for free-standing sculptures…

The papier-mâché…
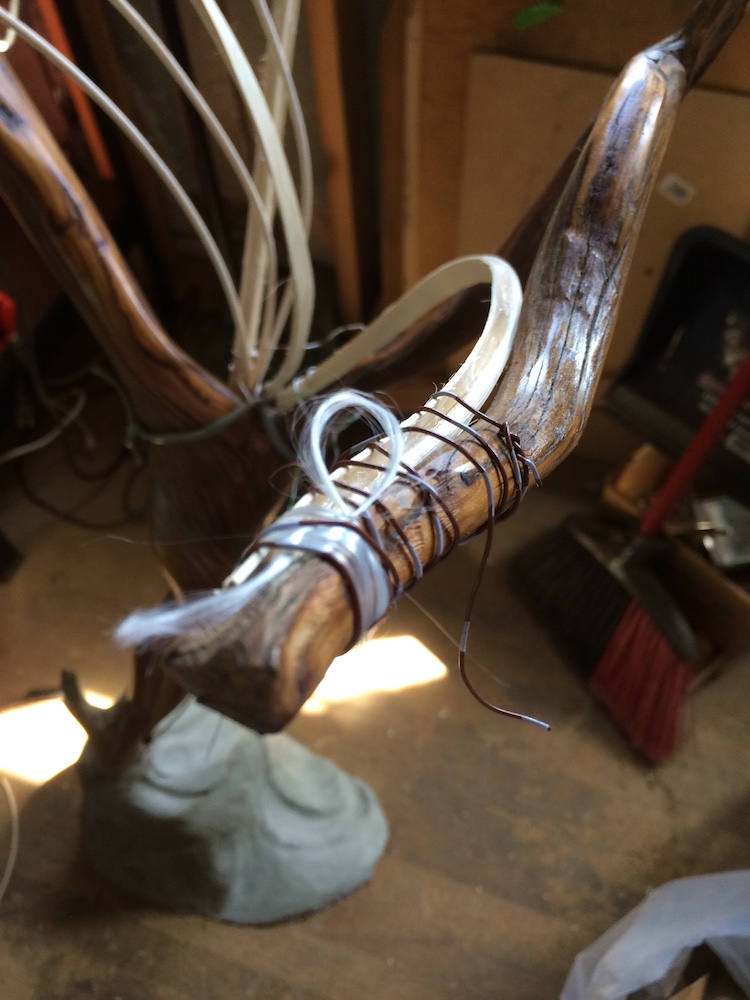
Once the wood is supported, either with a formed concrete base or with clamps or hooks to hold a wall-mounted style still, I add the wiring to what will become the inside of the sculpture. I then begin to attach the reed which will become the visible “skeleton” behind the papier-mâché. Finally, the first of many layers of papier-mâché is added to stretch across the reed sections. While wet, it is very fragile. Once dry, it is amazingly hard and durable. After the sculpture is complete, I spray generous layers of matte finish polyurethane to protect it from humidity. This also adds to the durability of the papier-mâché over time.

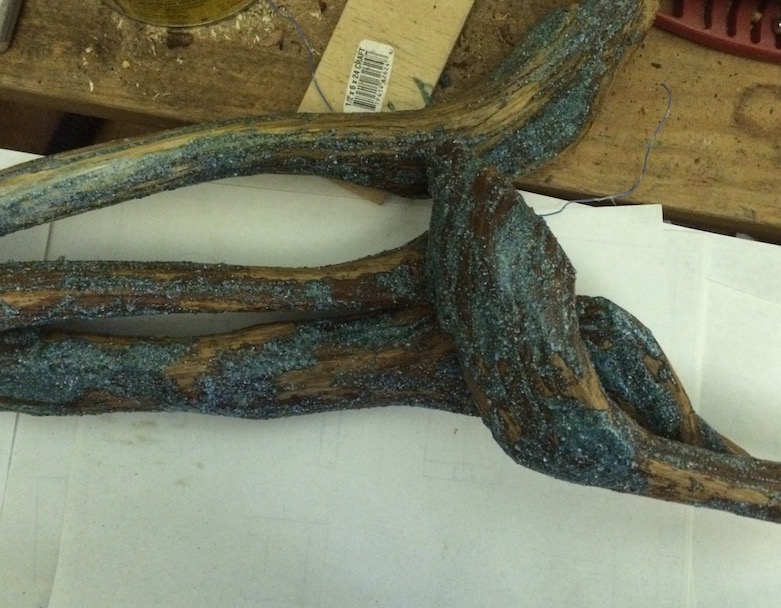
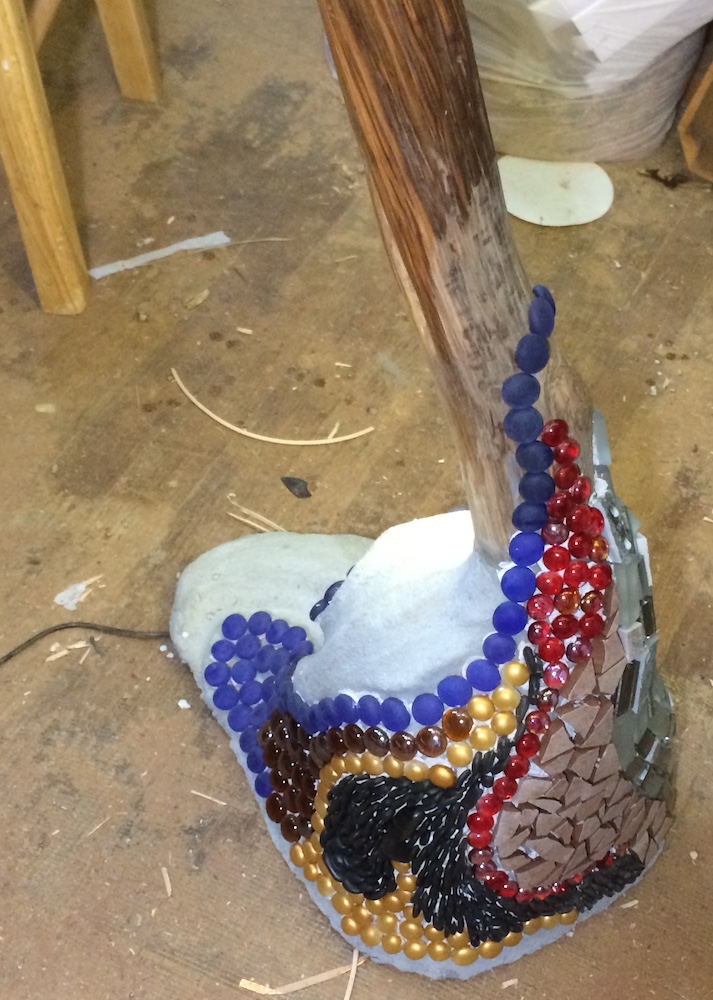
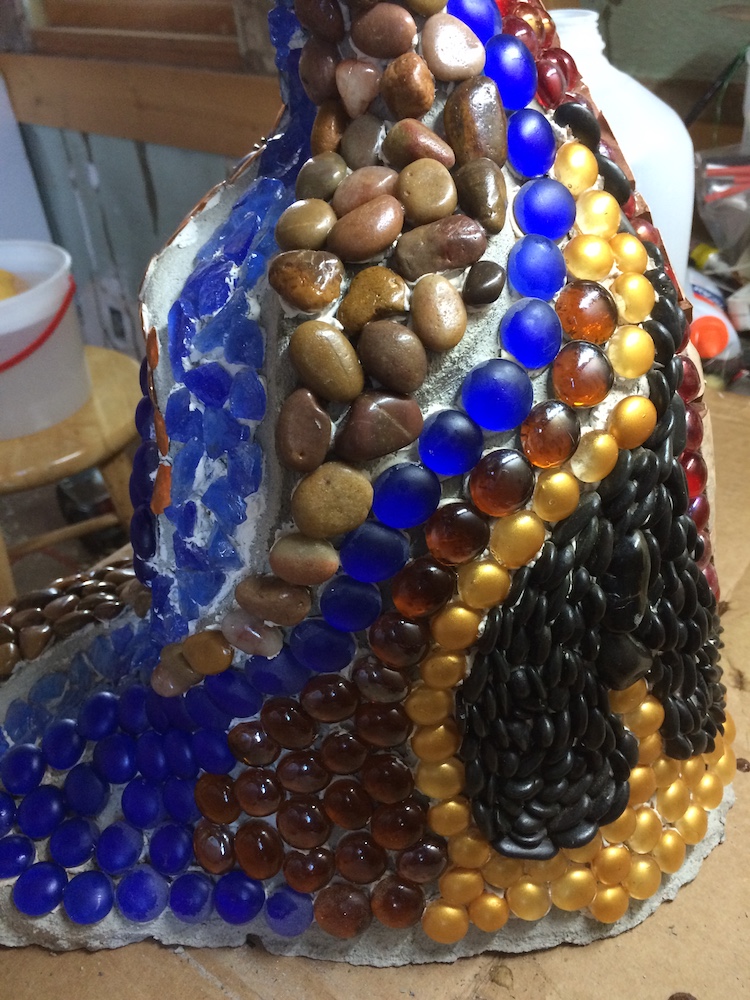
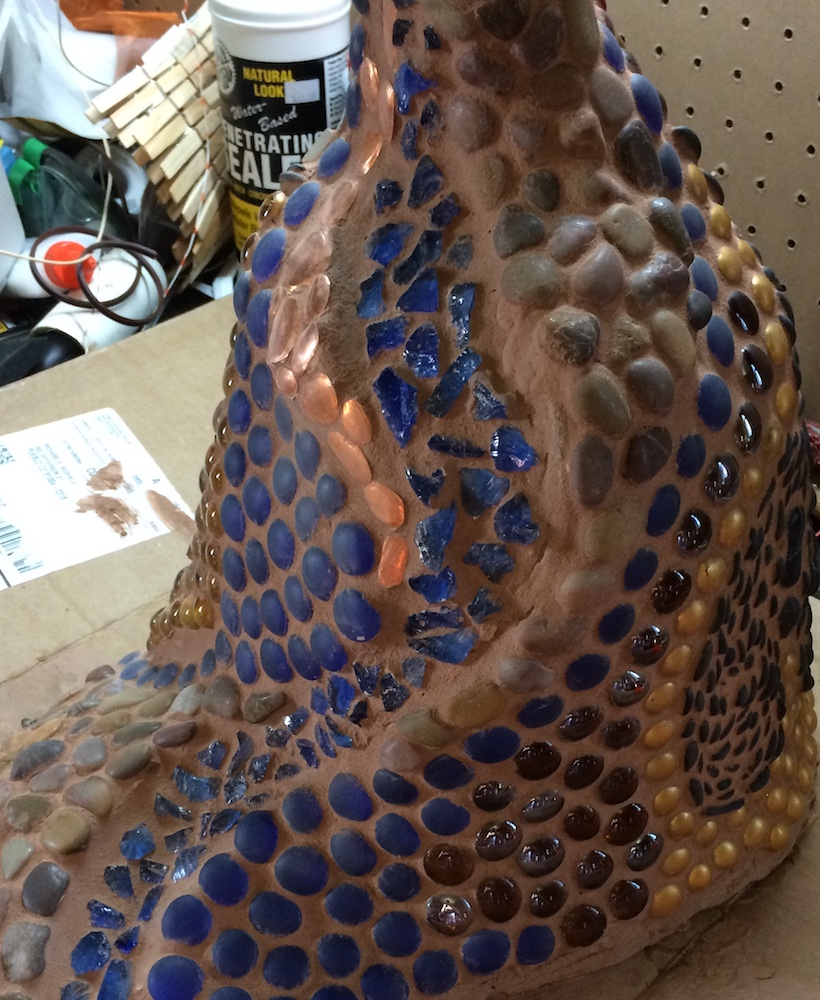
The base is covered with mosaic tesserae of glass, tile, stone, and metal to add texture and color. Once all the pieces are securely in place, I add grout between the pieces, which smooths it and ties all the patches together, visually.
Other embellishments…
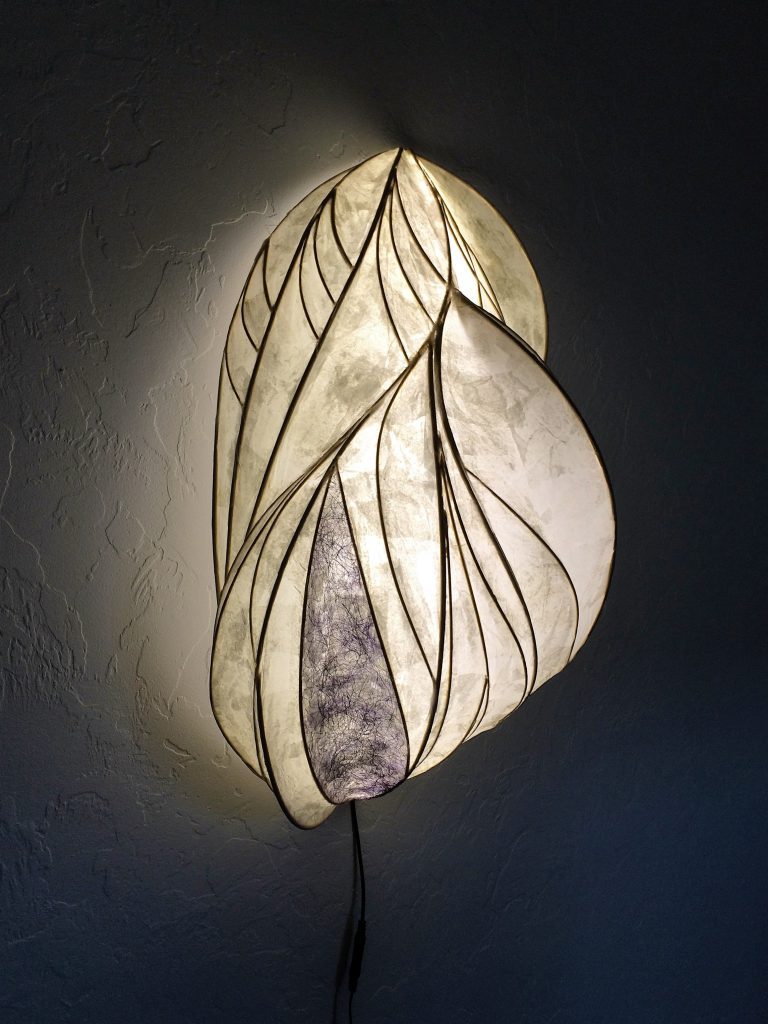
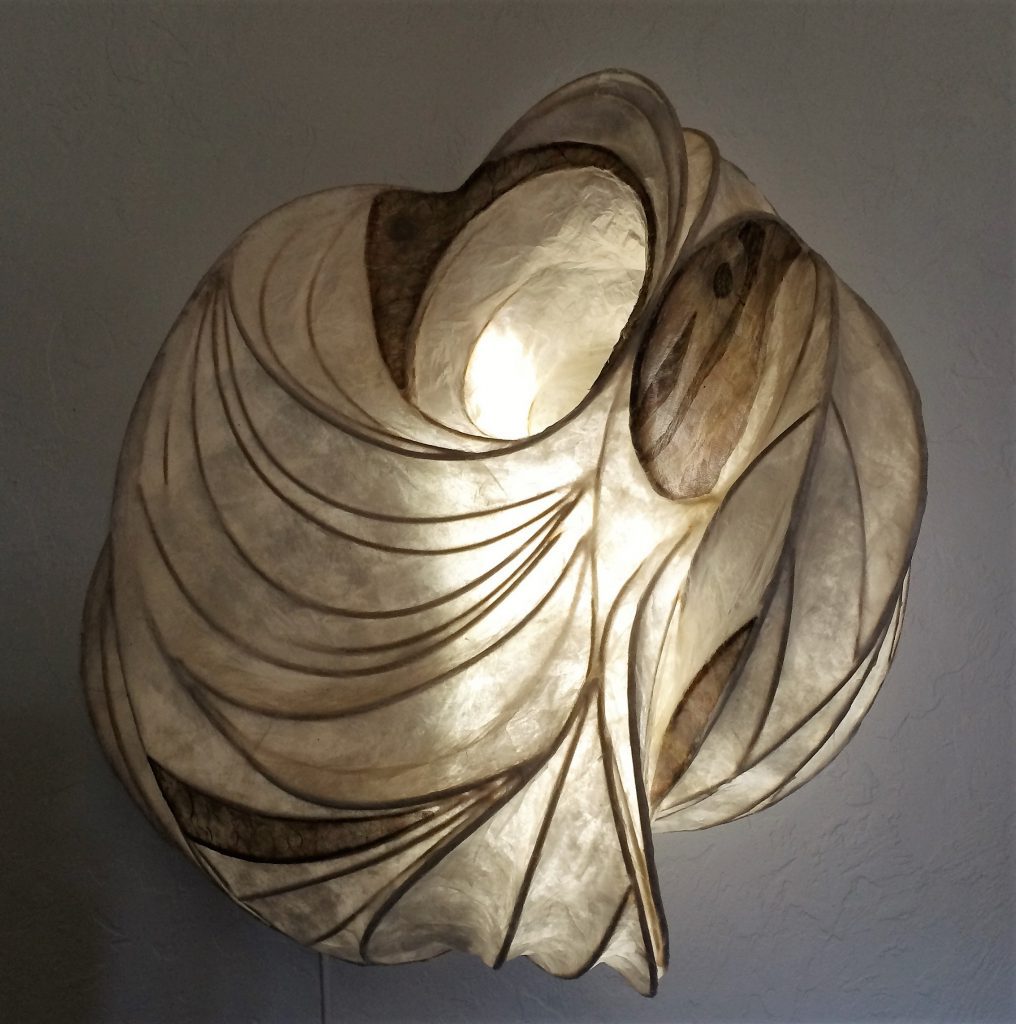
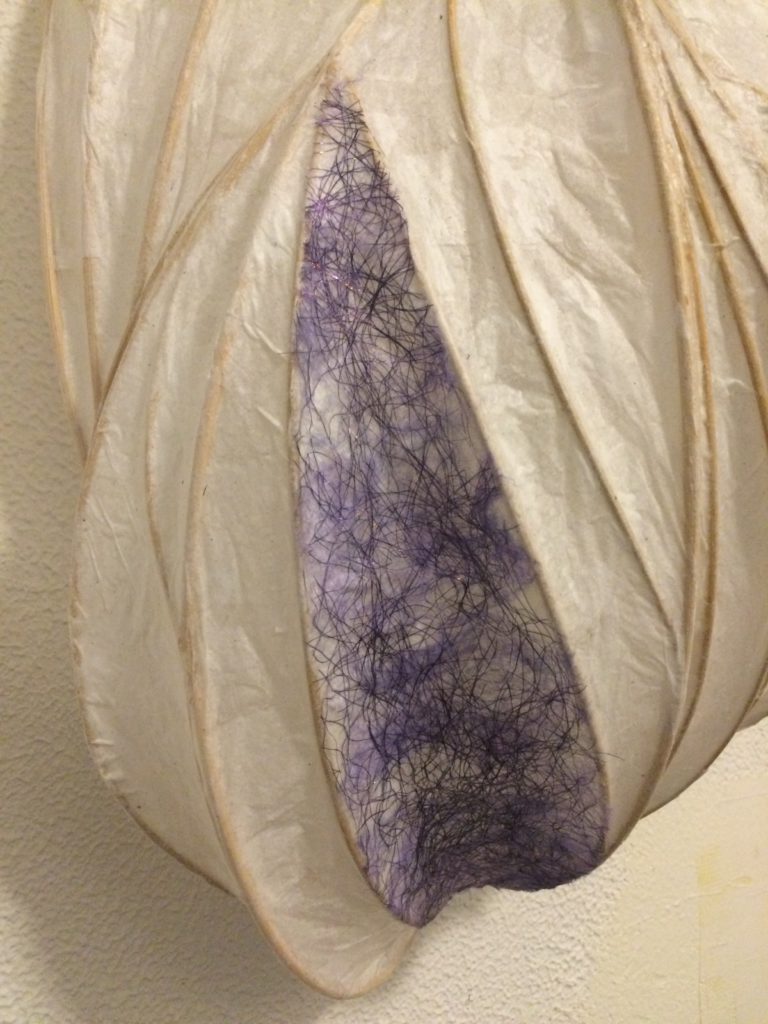
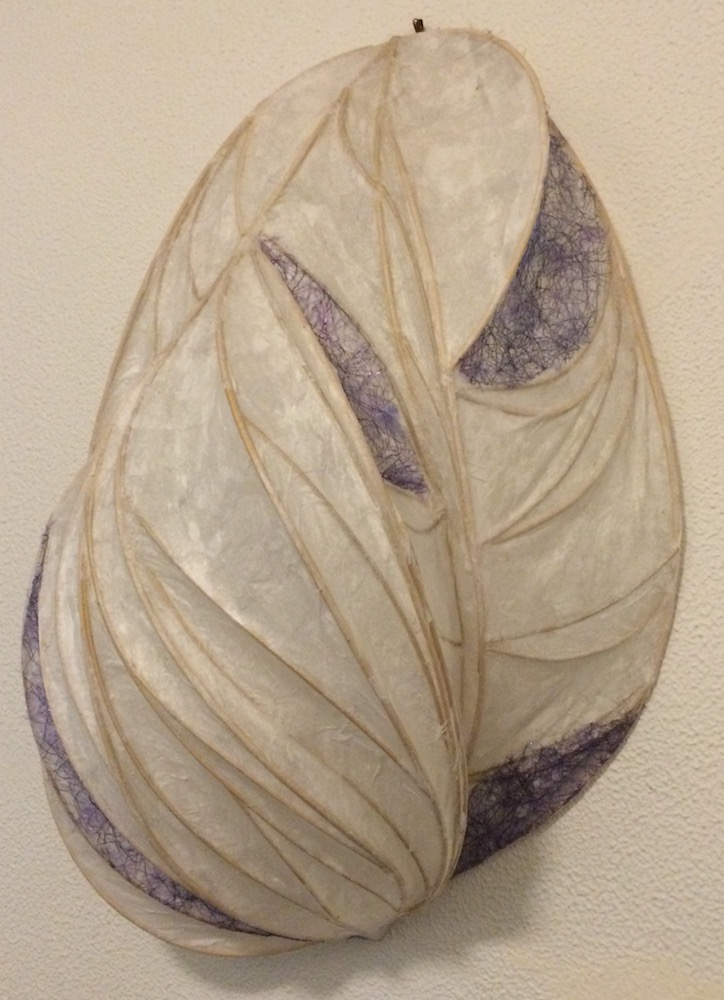
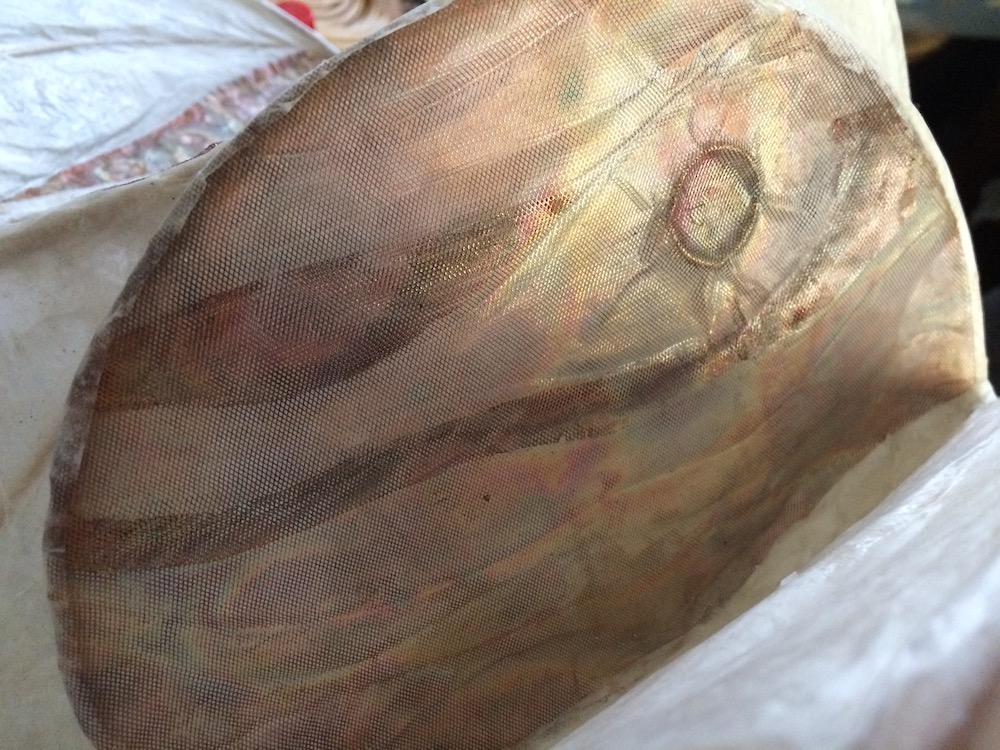
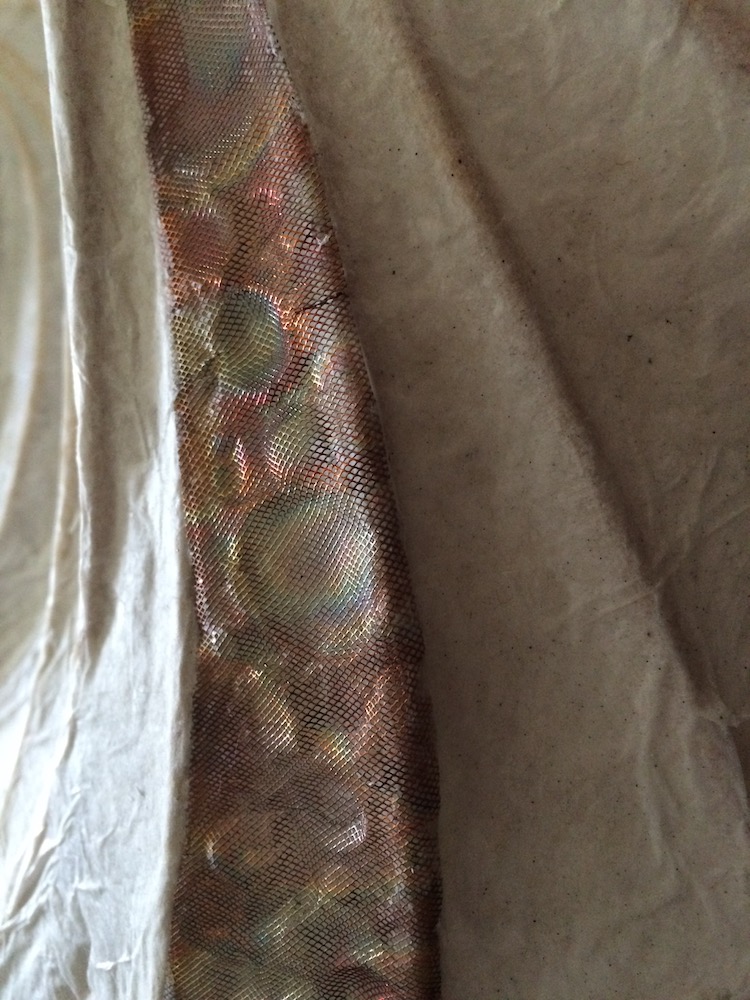
When I’ve finished with the papier-mâché I look critically at the sculpture with the lights off as well as on. Sometimes I feel that it needs some embellishment to make the unlit version more exciting. I add sections of color or texture that remain translucent but are interesting without being lit from behind. Here are two examples:
“Amethyst Budding” with silk and Angelina fibers
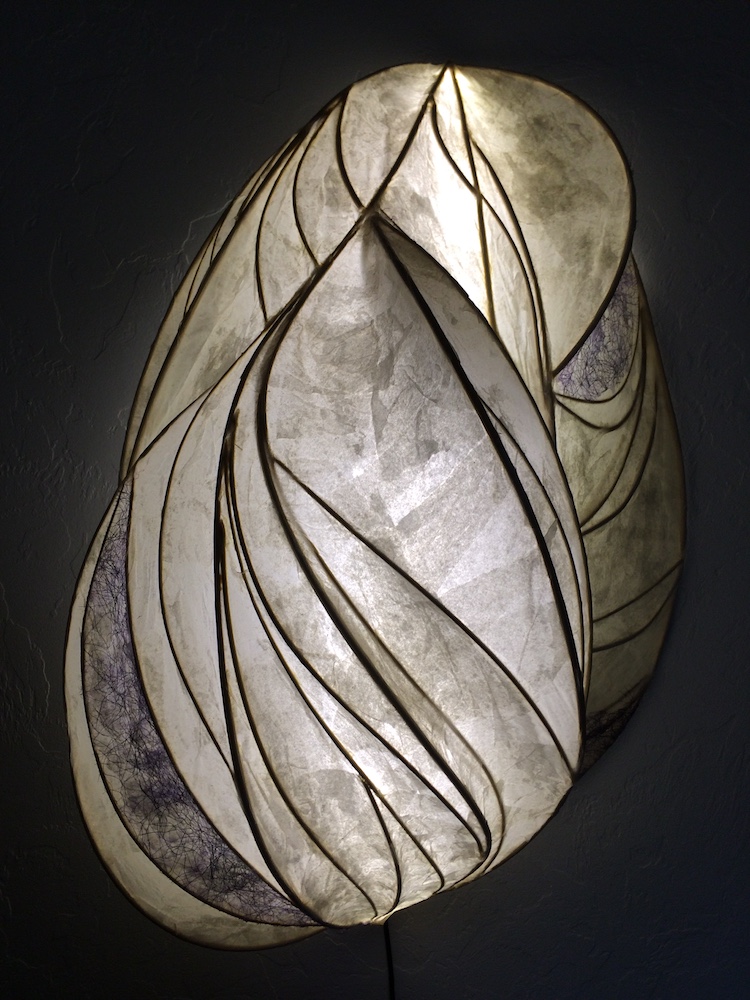
“Vortex Rose” with heat patinated copper repoussé.


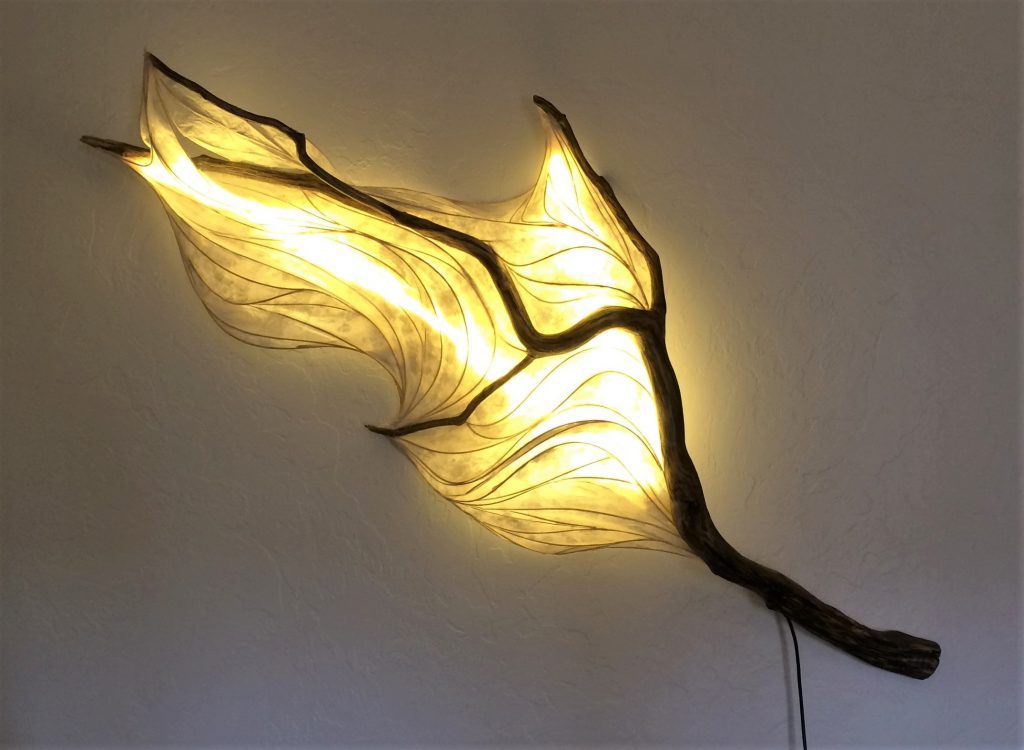
Finally, when all the elements come together, after hundreds of hours of work on some pieces…
Copyright © 2019-2024 Kelley Adams. All rights reserved.
All text, photos, and graphics are the property of Kelley Adams. They may be shared on Pinterest, but please offer credit to the author.
Exxelently funtabulous. I really thank you for your description provided. ur artwork is marvellous. highly appreciated.
The light sculpture is a nature art that were good.?
Thank you! You make absolutely beautiful light sculptures, too! –Kelley
If I had to choose-I would pick these Illuminated Sculptures as your most beautiful and inspired work. Brava!!
Thank you! They are kind of the sum of all my other interests, where I combine my love of fiber with my love of wood and metal…and rock…and light. I appreciate the compliment!
BEAUTIFUL!!!! You say you use LED strip lighting. What’s the wattage and the length you use?
Thank you, Christine! The length and wattage varies with the sculpture. (I wanted Dry Lightning, for instance, to have a really intense burst of light in the center, so I used the more intense strips with closer lights.) I cut the length of the strip for each sculpture, and often have to connect them in a Y to branch off. I chose LED strip because it produces next to no heat, and I’ve always worried about the buildup of warmth inside a paper shell. The strip limits me, though. I haven’t made really small sculptures because of the complications of using 12v transformers and LED strips with only a few bulbs. I can do it, but I’ll have to consult an electrician again to make certain it’s safe and that the lights will last for many years.
How can I purchase your work
Kimmie, there is a “Shop” button in the menu with my various pieces of artwork that are currently for sale. I don’t have all my illuminated sculptures listed for sale on the website– I have a few at a local gallery. If you don’t see one listed that interests you, let me know and I can show you photos of other available sculptures.
Could you say a little more about how you attach the reed strands to form the skeleton? Do you glue the end down to the branch first? Do you find one kind of glue better in general? You are doing very beautiful work with these sculptures! ? I really like the convergence of natural materials and techniques you’re adapting. I learned in a rust dyeing class I took that tissue paper is surprisingly sturdy when it dries, though super delicate when first pulled out of the dyeing bucket. That makes it easier for me to understand what you mean about the sturdiness of your sculpting materials when dry. Thanks for sharing!
I use a hot glue gun to hold the reed segments in place. On its own that is not very sturdy at all. As soon as a single layer of tissue/glue is dried over the joints, it is held securely and I can begin to add multiple layers. I can go up to as many as 20 layers in areas that need the support, but they have to be saturated in the glue to maintain translucence.
Hi Kelly, what beautiful pieces… stunning. Just one question, Ive been making lanterns with children using willow and tissue paper. The thing is I have had to buy in wet strength tissue paper from abroad and I want to find a solution as to how I could strengthen the tissue paper and so I could stay local and sustainable. Do you have any recommendations how to strengthen paper please. Once i pcover it with watered down PVA it just disintegrates.
Beautiful work Kelly. thanks, Kxx
Thank you for the compliments, Karen!
As to the soggy tissue problem, my best advice would be to avoid soaking the tissue. I dip and use a sponge brush to squeeze out excess moisture back into the container. I generally use one longish strip to set the curve I want between spokes of reed, let it dry completely to harden, and then start applying smaller pieces of the wetted tissue. (No special tissue- just the ordinary gift tissue. I’m careful not to get any with a plastic coating, though.) I’ll go up to 20 layers of tissue to make it strong.
Your work is inspiring. I just love it. And l decided to make one lamp as gift for my mother. Just wonder if you sink the paper in water or kind of resin. Thank you. Many regards from Athens.
Sylwester
I use white glue. It is definitely an indoors only sculpture. Experiment with what you have available where you live. You want a glue that is ph balanced for paper to help it last as long as possible. Have fun, and send me pictures!
Your work is amazing !!! My mother loves such exquisite and unique things. I would like to try to do such thing, if I succeed. can i use artificial rattan instead of cane? and paper I have tracing paper. will it fit?
Thank you for the compliment, Daniella! I have not tried artificial rattan, so I can’t say how it behaves. If you have access to thick wire (10-15 gauge) it might be a good substitute for the reed. It needs to be flexible, but hold its shape firmly once it’s bent where you want it. Start with a very simple design to test your material. As for the tracing paper, I wouldn’t recommend it. It usually has some sort of sizing in it which makes it stiff, so every bend makes a crackle mark. It could be interesting, if you find the right glue, but I wouldn’t try a first project with it. I rip the tissue paper into small bits so that I can create a curved surface. Using whole sheets of paper limits the organic appearance of the finished sculpture. Hope this helps! Be sure to send photos if you try it.
Hi Kelly, beautiful sculptures! Can I ask, with the concrete base, is it cast to that shape or is there a type of concrete that can be shaped and moulded by hand? It looks fab! Xxx
Thanks, Amy! You can actually sculpt any type of concrete, by letting it set awhile before you work with it. (This is a great book for information on that- Creating With Concrete.) For the Desert Schooner, I used a cheap plastic bucket upside down underneath the concrete, to house the transformer and to lighten the finished base. (It’s still really heavy, in order to make the 6′ sculpture stable.) Then I used a concrete patch mix over it to sculpt the shape. It has a lot of polymers in it, making it kind of springy, and no larger gravel, so it takes sculpting well.
Happy Creating!
-Kelley
Absolutely gorgeous ❤️ I have quite a bit of driftwood laying around, I live near the beach in Florida… I’ve been trying to figure out how to use it. This will be a good experiment for me, I do different types of sculpture and several other types of art. I will definitely send you some pictures of the end result ? thank you so much for your inspiration.
M.Jenkins
“Creative Clutter”
Thanks, Martha! Can’t wait to see what you make!
–Kelley
Kelley, just want to thank you for sharing your knowledge of the beautiful pieces! Your work is amazing…inspirational!
Thank you so much, Kendra!
Hi, what exactly do you use for the papier-mache?
Hi, Martina! I’ve used a wide variety of materials for the papier mache skin on my sculptures. Depending on how thick the surface needs to be, how much light needs to diffuse, and the curvature of the “cell” between reed pieces, I might use handmade paper (which I make from local plants, mostly) or rice paper or tissue paper.
–Kelley
C’est vraiment magnifique, je vous félicite pour votre créativité et votre sens de l’esthétique. J’ai un petit bois flotté et j’aimerais bien m’en faire une lampe dans ce style, j’ai un peu de résine mais j’ai peur qu’elle ne jaunisse à terme, pouvez vous me conseiller une résine? Je ne sais pas si vous vendez vos oeuvres mais j’aimerais bien un jour avoir les moyens de m’en offrir une… Merci et bonne continuation
Merci, Mimi! I’m not an expert on resin, so I will limit my advice. The labeling should be very clear if it is a non-yellowing type. I have used Art Resin brand, which is very expensive but clear and shiny, and is supposed to be non-yellowing. If you make a lamp, won’t you please send me pictures? My pieces are for sale, and I usually have 2-3 listed here in the “Shop” section of this website.
–Kelley
How absolutley stunning. So much work and dedication has definatley paid off. So very other worldly and ethereal..how could u not relax and be transported to some magical place with this glowing gently in the room somewhere. Thanku for the tutorial…just beautiful ?
Thank you so much, Kaz! I’m happy to hear that these sculptures bring joy to others. I love making them!
Thanks so much for your article, really apreciated. Amazing art though.
I only have doubs, or I didnt catch it maybe. What wood are u using to build the constuction, the shape?
I see wires and wooden strips. I would love try this amazing organic experiment.
thanks so much and kind regards from Czech republic.
Tereza,
I use reed for the “skeleton” of each piece. Any wood suitable for basketry should work, too.
Such incredible art. You are very talented. Could you please tell me what size reeds you favour using in your sculpture? I am wanting to make one for my best friend as a wedding gift and I can only hope it will turn out a fraction of how beautiful yours are. Appreciate any info you can offer.
Thank you! I really experiment with the reed, and don’t use just one size. I’ll use a thicker reed for stronger structure (and stronger visual line) but a much smaller size to make more delicate lines. I encourage you to just play! This is a time-consuming project, so it pays to immerse yourself in the playfulness of creating.
I am inspired by your work and wonder if you might like to Zoom with my class. I teach sculpture at the International School of Manila.
Thank you so much! I’d be delighted to speak with your class. Please contact me privately at kelley@homegrownartworks.com for details.
–Kelley
Your works are breathtakingly beautiful. Thanlyou so much for sharing your process, and explaining the painstaking yet spontaneous process. I love discovering artists who are also masters of their craft, with unique style and great passion for what they create.
What a wonderful compliment! Thank you,
–Kelley
Stunning work!!! I have made a few small pieces and wonder if you use some kind of lacquer or polyurethane on the completed shade. I worry about keeping them clean, or being able to dust them. But flammables make me cringe. Then just letting them “BE” isn’t such bad idea ; } I have a deep appreciation for what you have accomplished. You wear many hats to accomplish your desired outcome. Kudos!
Thank you so much for your kind words! In previous years I have left the paper surface as is, but my more recent pieces are sprayed with a matte finish varathane to protect the sculptures and make them easier to clean. I am experimenting currently with using an epoxy finish, to make the surface more puncture resistant and durable. So far, I haven’t found a satisfactory solution. As for flammability, I made my first sculptures of this sort more than 20 years ago, but was afraid that they would be like making time-consuming flammable torches if I put a regular light bulb in there. Cool LED bulbs changed the game! I use a thermal reader around the lamps to ensure that heat isn’t building up. I doubt if adding petroleum based sealants make paper and wood any more flammable than they already are.
–Kelley
Hi I’ve been a huge admirer of your work for quite some time. I’ve recently finally attempted my own lamp after a number of years. I couldn’t find much info on materials so visually studied works of art I could find online. I’m from Hawaii so we do get some nice driftwood here. My current piece is ironwood and tissue paper. I’m looking to maybe use some mulberry paper so I guess my question is what thickness would be suitable? The thinnest I’ve found without breaking the bank is 20gms, is that too thick?
The reason I don’t generally use the thicker papers like mulberry, or my own handmade paper is that it doesn’t bend. All my pieces have concave cells between the ribs, (because I like them that way), but that makes a much slower and more difficult process, as I strip my paper into small bits to get them to have a smooth convex transition. If you layer thicker paper like that, the light will not shine through. So, I stick with tissue paper torn into small strips.
A lot of artists using a similar process will use much simpler rib structure and stretch a single, large piece of strong paper over the skeleton. It’s more like an Old West covered wagon, simpler and straighter than mine. I am always torn, no pun intended, about simplifying my process to reduce the cost of my pieces. Less torn strips, more giant sheets of nice paper. But, I am what I am.
~~Kelley
P.S. Send pictures!